BEFORE YOU BEGIN: Kubernetes evolves at a rapid pace. Please make sure you check out BOTH installation and configuration instructions if the below guide doesn’t work: https://metallb.universe.tf/installation/
Network overview
| Network Name | Home Network | Node Network | MetalLB Address Pool Network |
| Network CIDR | 192.168.1.1/16 | 192.168.3.1/24 | 10.10.0.0/24 |
For the MetalLB Address Pool, you’ll want to use a completely unused CIDR subnet. This can be COMPLETELY different than any other networks that you have. This is why I’ve used 10.10.0.0/24 which is different from any other network.
Autonomous System Numbers (ASNs)
ASNs are assigned to each “router” in this deployment. For this walkthrough, you can use the following numbers. You can use any number as long as they are private AS numbers between 64512 and 65534, inclusively.
MetalLB ASN: 64500
Router ASN: 64501
Resources Created
Using Flux / FluxCD?
If you’re a masochist such as myself, and you’re using FluxCD / Flux, you’ll need a set up similar to the following:
MetalLB specific configuration options:
MetalLB HelmRepository
MetalLB HelmRelease
If you want to debug any issues that you may be having, you can use a HelmRelease like the following:
Not using Flux?
If you’re not using Flux, you’ll need to take the information above and apply it to your specific set up. My deployment essentially breaks down into 2 parts:
- Deploy the Helm Chart
- Add the additional configuration options via Custom Resource Definitions (CRDs)
Following the instructions here for installation via Helm:
Then you can deploy a configuration file such as the following (after saving it to something such as metallb-config.yaml):
via
pfSense Time
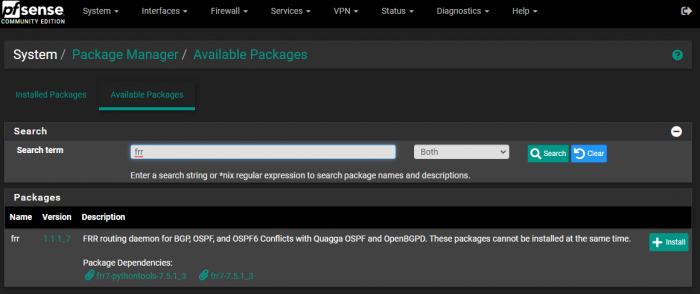
In other guides OpenBGPD is used, however this package has been deprecated. Now only the frr package remains, which we’ll be using for this walkthrough.
BGP / FRR Configuration
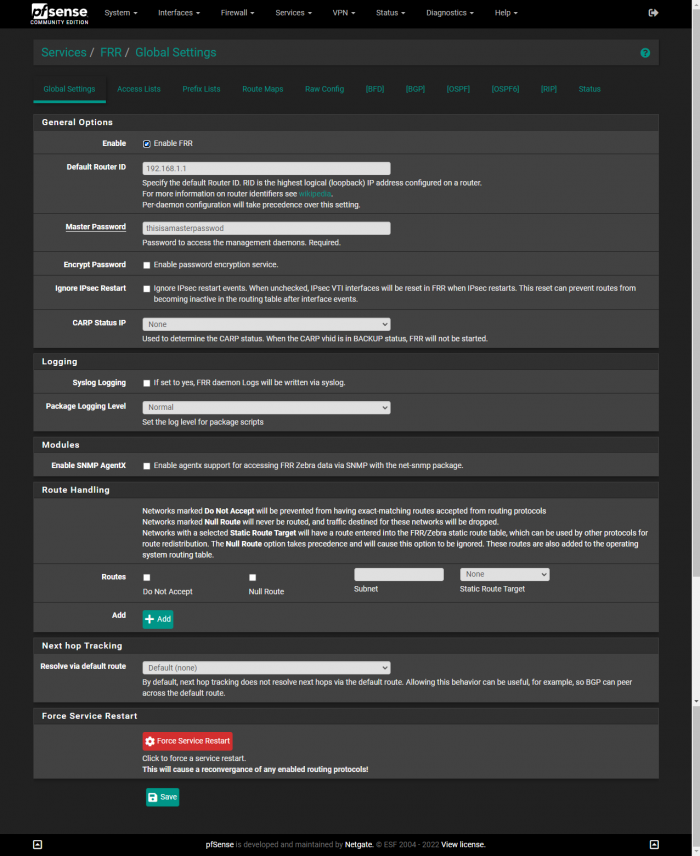
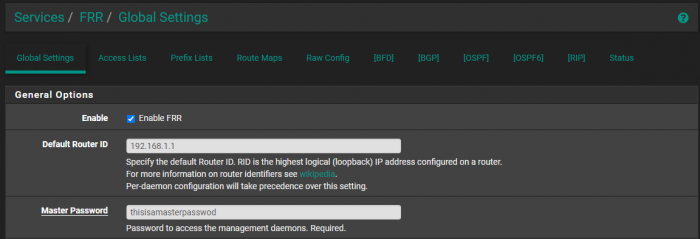
You’ll want to set up the Default Router ID to be the IP address of your router under FRR → Global Settings.
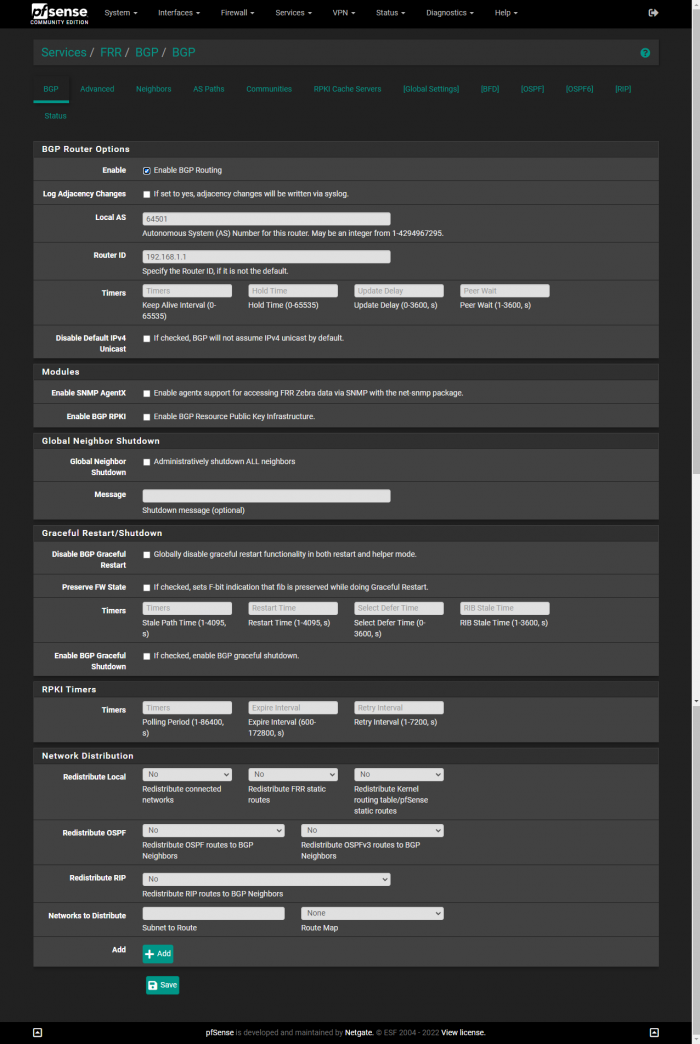
Under FRR → BGP, you’ll need to enable BGP router, setting the Local AS to that of the Peer ASN that you defined in the MetalLB configuration YAML. You’ll also need to enter the Router ID again.

You’ll also need to check the box for Disable eBGP Require Policy.

FRR Configuration
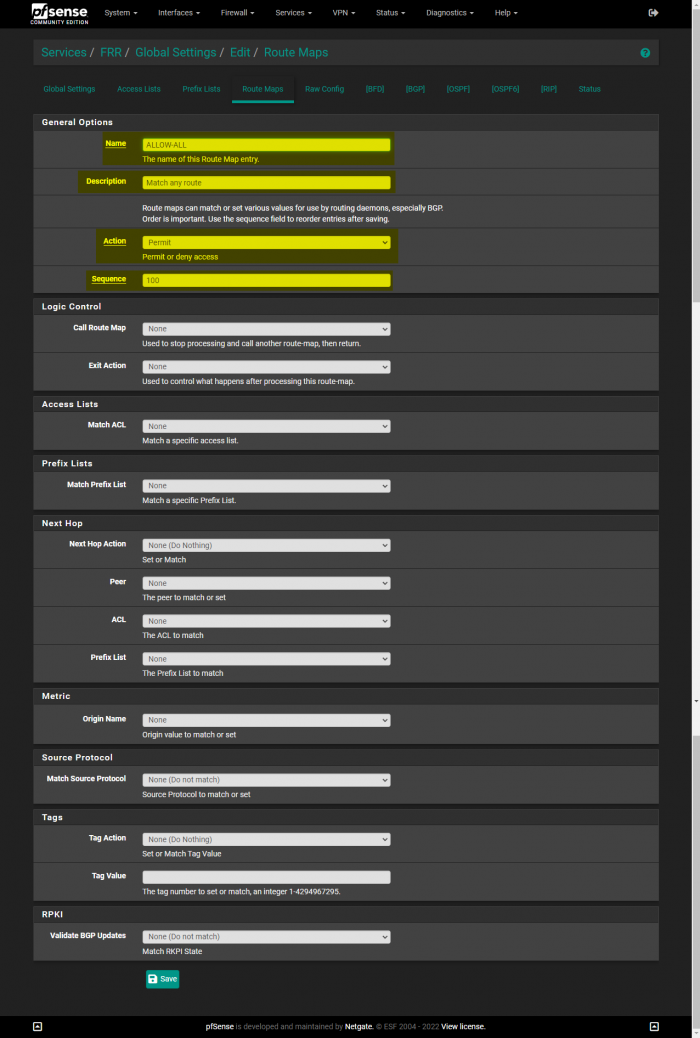
With the latest version of the FRR package on pfSense, by default, it no longer accepts all routes being sent to it from other routers. You need to create a new Route Map under “FRR → Global Settings → Route Maps” with the following information:
Setting up BGP neighbors
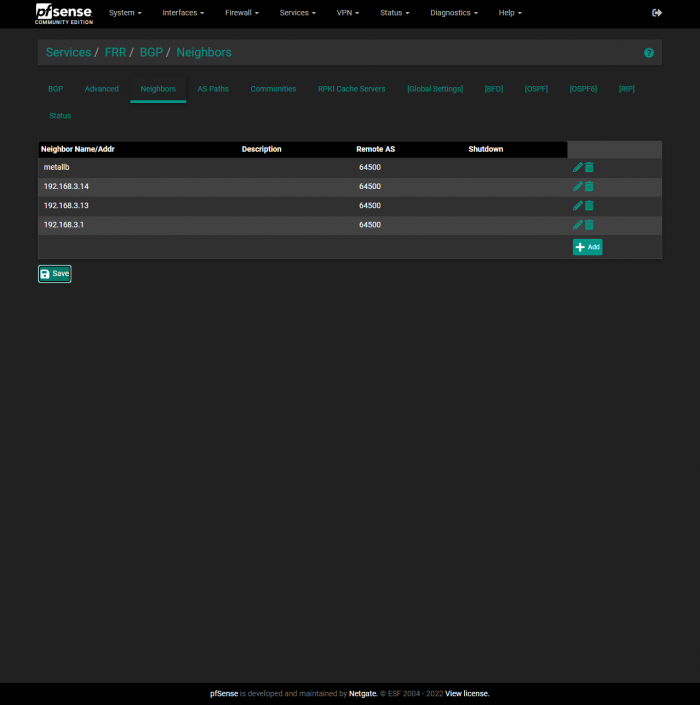
Now we need to define each of the Nodes that will be running MetalLB. Currently, I only have 3 Nodes running. They have the following IP addresses:
192.168.3.1192.168.3.13192.168.3.14
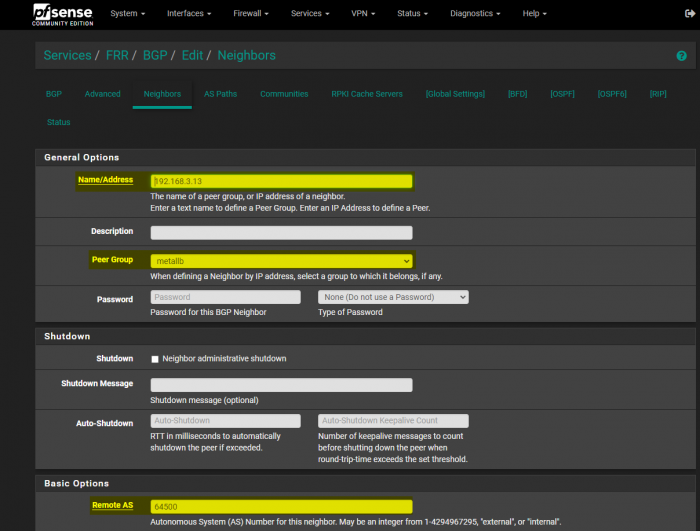
In order to benefit our possible future selves, we’re going to first create a Peer Group that we can add the nodes to. In the following screenshot under FRR → BGP → Neighbors, we first create a Peer Group named metallb. Then we provide the ASN that we placed in the MetalLB configuration as myASN.
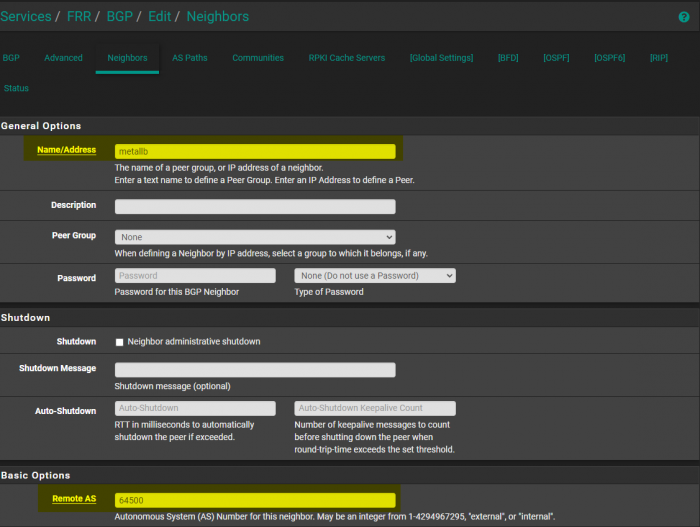
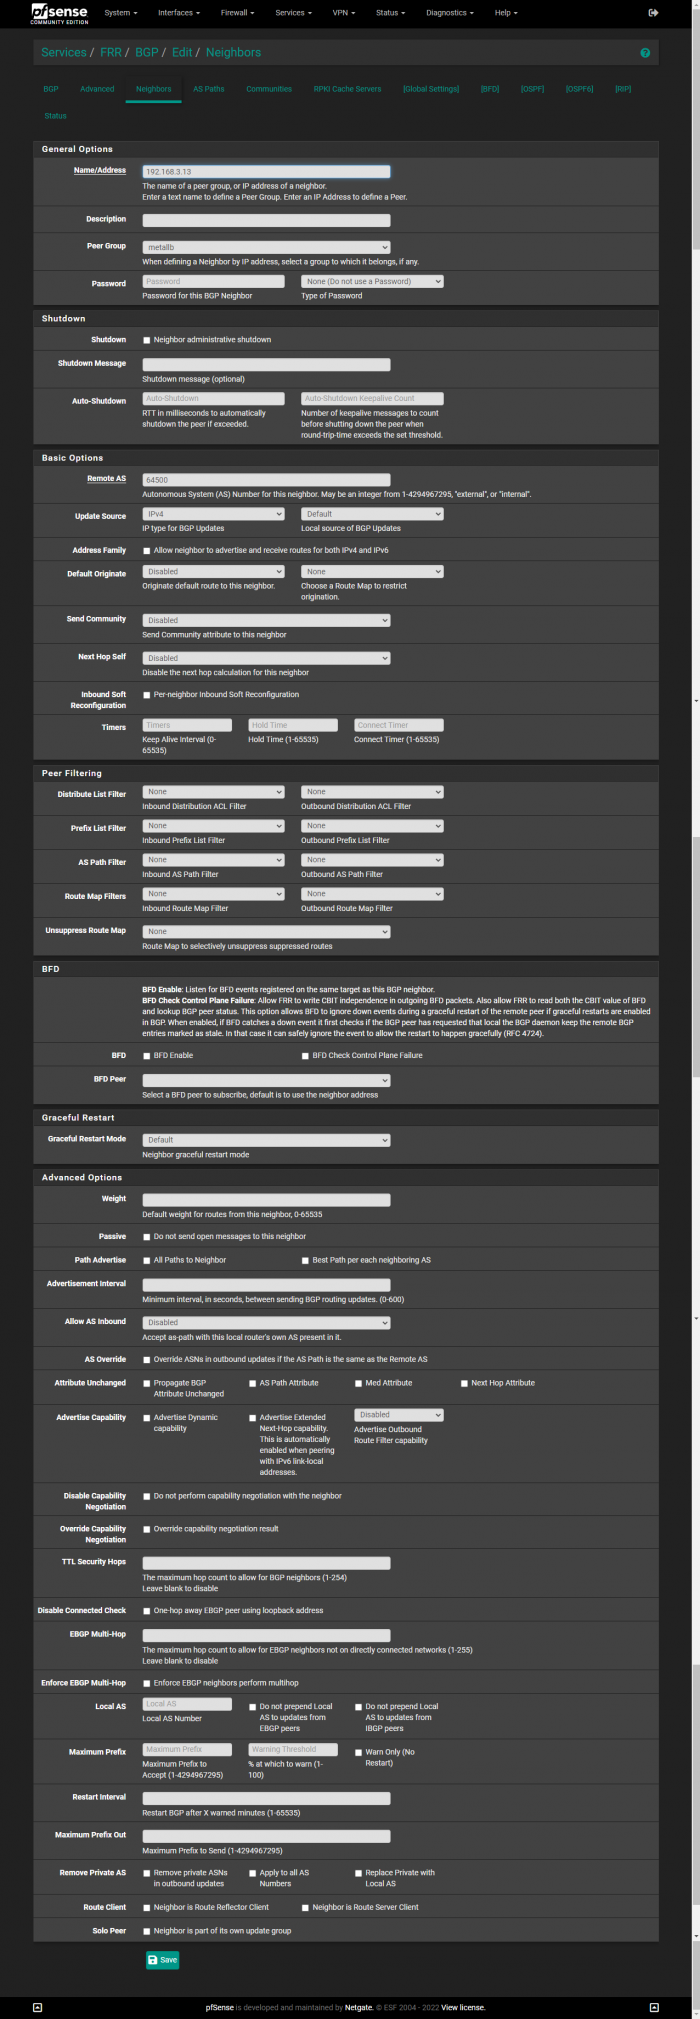
Now we can add our Nodes as peers. In the following screenshot, I am adding my 192.168.3.13 as a peer.
The values Name, Peer Group, and Remote AS need to be modified:
After setting the neighbors, create a test app/service like the following:
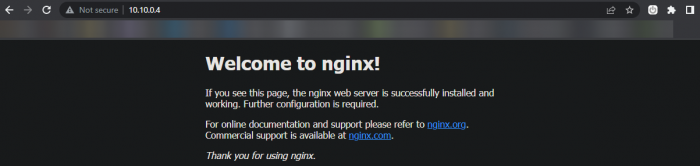
Should present you with output like the following, assuming that MetalLB is assigning the LoadBalancer service IP addresses:

Navigating to the IP address shown above, shows us that we successfully deployed MetalLB in BGP mode with pfSense:
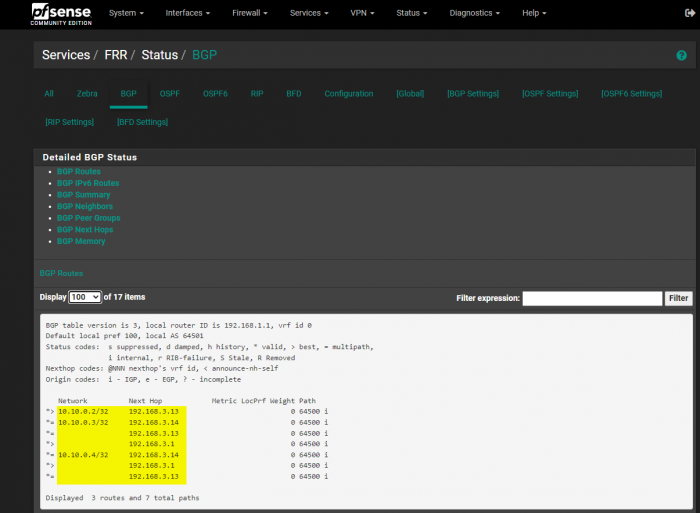
You can also look at the BGP status page in the FRR extension in pfSense:
Additional Screenshots of pfSense Configuration
Incase there’s something that I missed, or that you would like to see, I’ll include some additional screenshots here.